
MED1452_Applying Animation CW1
- 40084662thesecond
- Jan 26, 2023
- 5 min read
Updated: Feb 3, 2023
Week 1
For this piece of course, we have to design a character model in order to 3D print the head (in multiple pieces) for use in a series of 3 Stop-motion animations that are to last between 3-5 seconds a piece.
The first thing we had to do was make and/or download a 3D printed object for a session where we practice using 3D printers, I decided to make a simple lock because I wanted my object to be printed relatively quickly:

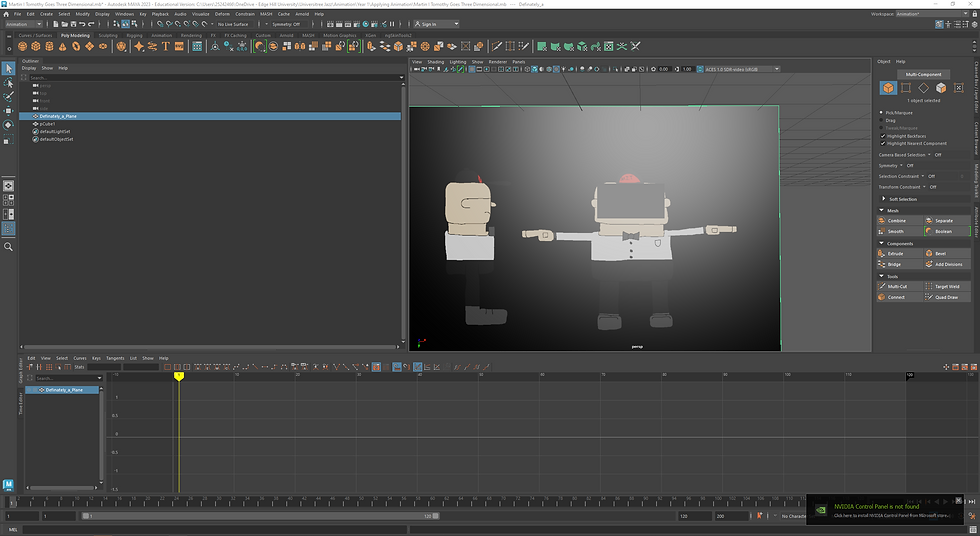
After the very first lecture, the first thing I decided to do was get started on designing a new character from one of the personality templates they gave us to work with for the Stop Motion task we've also been given. I went with the dull and boring one because I figured I would get the best design and after about 20 or so minutes I ended up landing on this design:

I designed the character out of rounded square shapes to show just how much of a boring square this guy is (the only full on round part of his body is the nose). I made his skin pale to show how he never goes outside due to his constant studying and I dressed him up in stereotypically nerdy clothing to emphasise that he is in fact a dull nerd.
An Update on the 3D Lock
so during Thursday's session we ended up learning how to use the 3D printers and because of how long it took to print out each object, we had to work in groups. However, since I didn't really have a group in mind, I basically had to finesse the whole thing by finding a group as I went along (an approach that isn't really a good idea when it comes to animation). Of course, when I say "finding a group", I really just mean running around sticking other people's 3D stuff on my pen drive (with their consent of course) and then putting them into a piece of software called "Ultimaker Cura", a piece of open source software designed for use mainly with Ultimaker's 3D printers (because I guess open source software is only allowed when somebody else says it's allowed and/or there's a paid version out there).
Luckily, I was able to get most of my group's 3D printed objects printed out with the assistance of one of my tutors to guide me along the way although sadly, not everyone's prints came out right because they were too small. (I definitely could have done a far better job getting everything to a reasonable scale)
Overall, while things were a bit chaotic for me the whole time since I was doing a lot of running around making sure to grab an adequate amount of stuff off of other people (one of which ended up needing to be scrapped in the end due to being too thin), I did personally enjoy getting to work with a 3D printer and I do quite like how my 3D lock came out
{insert funny lock picture here}
Now that that's been taken care of it's time to make the 3D model for Martin I Timothy.
The 3D Model For Martin I. Timothy
Week 2


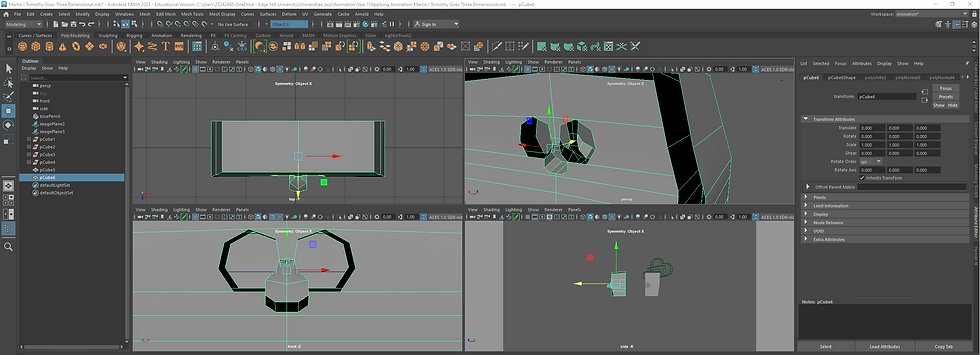
Here, I'm using the image plane as a reference to make sure the 3D model for Martin I Timothy looks as close to the 2D drawings as humanly possible, doing so is proving to be quite simple thus far but since Maya is a 3D software, things are going to get a lot more complicated.

I think it will be easiest for me in the long run if I create all the edge loops for the eyes and mouth at once because then I wont have to worry about doing it later.

Afterwards, I decided to use the multi-cut tool in order to create the geometry for what will eventually become Martin's eyes because it was the easiest solution I could think of.

After drawing the outline for the nose using the multi-cut tool (which is currently proving to be a god-send in terms of the more rounded shapes) it was time for me to extrude the newly created faces and morph them so that they go around the shape of the nose.

This process turned out to be a little bit more difficult than I'd anticipated because for some reason whenever I would select one face individually, it would go ahead and select an entirely different face on a different part of the model.
Now all I need to do is double skin the front and back parts of the model and I'll be finished with Martin's head.

The reason I need to do this is because at the end of all of this 3D modelling business, I'll need to 3D print my head model out to a certain scale relative to a stop motion skeleton we will be working with for the stop motion portion of this assignment coming up in a few weeks.

One of the tutors and I have ended up needing to work together in order to fix my garbage topology because of inherent mistakes I made when creating the model in the first place. This job is proving to be quite difficult, especially due to a bug I caused where selecting one face will cause the software to pick a completely different face entirely (which strangely does not happen with edges or vertices). The fact I have ended up here is making me question why I decided to make my head so cartoonish in the first place, as there is a more realistic head template I could have altered instead, but I think doing this will come out better in the long run.

So as it turns out, I have screwed things up so badly that the tutor ended up needing to reset parts of Maya itself and show me another method to do what I've been doing.


After a quick bit of googling in order to find out what's causing my face selecting problem, I ended up needing to switch the software's rendering engine to "DirectX 11" instead of "OpenGL" and for some reason, it ended up working like that random guy on the internet said it would.
Now that that has been rectified, It's time for me to make yet another attempt at doing this head.

The reason for this is because when I shrunk the "internal" copy of the model down, the eye holes also shrank down with it, so I'm lining up the vertices using the front view as a point of reference to make fitting the 10mm eyes easier. On that note, I now have to go and switch this to a PowerPoint presentation because Wix has decided to stop letting me freeload altogether.


Comments